 1
 2
 3
 4
 5
 6
 7
 8
 9
10
11
12
13
14
15
16
17
18
19
20
21
22
23
24
25
26
27
28
29
30
31
32
33
34
35
36
37
38
39
40
41
42
43
44
45
46
47
48
49
50
51
52
53
54
55
56
57
58
59
60
61
62
63
64
65
66
67
68
69
70
71
72
73
74
75
76
77
78
79
80
81
|
{
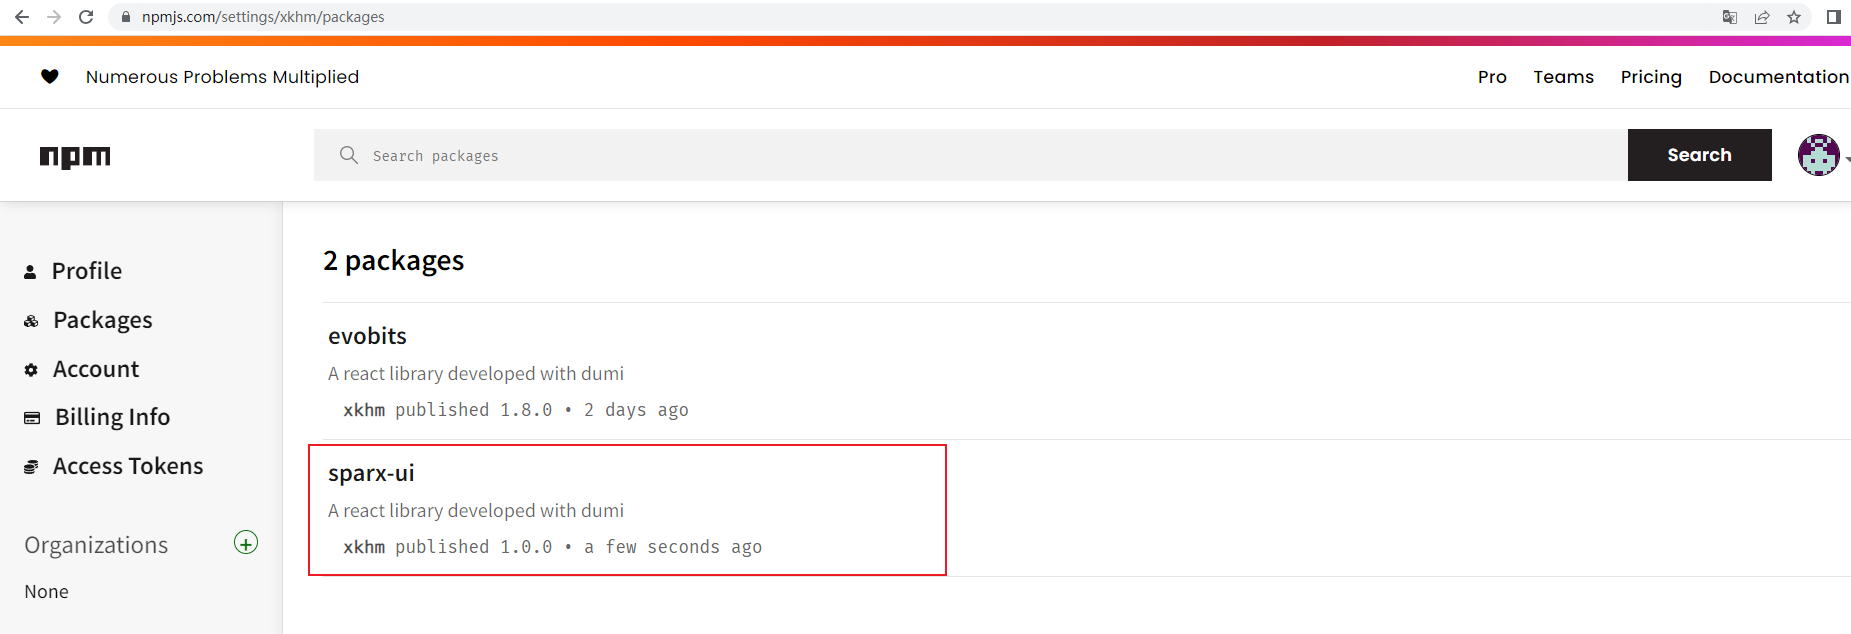
"name": "sparx-ui",
"version": "1.0.0",
"description": "A react library developed with dumi",
"private": false,
"module": "dist/index.js",
"types": "dist/index.d.ts",
"scripts": {
"start": "npm run dev",
"dev": "dumi dev",
"build": "father build",
"build:watch": "father dev",
"docs:build": "dumi build",
"prepare": "husky install && dumi setup",
"doctor": "father doctor",
"lint": "npm run lint:es && npm run lint:css",
"lint:css": "stylelint \"{src,test}/**/*.{css,less}\"",
"lint:es": "eslint \"{src,test}/**/*.{js,jsx,ts,tsx}\"",
"prepublishOnly": "father doctor && npm run build"
},
"authors": [
"imxkhm@gmail.com"
],
"license": "MIT",
"keywords": ["React","dumi","sparx-ui","sparx","ui"],
"homepage": "https://github.com/yukiyukixing/sparx-ui",
"repository": {
"type": "git",
"url": "https://github.com/yukiyukixing/sparx-ui.git"
},
"files": [
"dist"
],
"commitlint": {
"extends": [
"@commitlint/config-conventional"
]
},
"lint-staged": {
"*.{md,json}": [
"prettier --write --no-error-on-unmatched-pattern"
],
"*.{css,less}": [
"stylelint --fix",
"prettier --write"
],
"*.{js,jsx}": [
"eslint --fix",
"prettier --write"
],
"*.{ts,tsx}": [
"eslint --fix",
"prettier --parser=typescript --write"
]
},
"publishConfig": {
"access": "public"
},
"peerDependencies": {
"react": ">=16.9.0",
"react-dom": ">=16.9.0"
},
"devDependencies": {
"@commitlint/cli": "^17.6.5",
"@commitlint/config-conventional": "^17.6.5",
"@types/react": "^18.2.12",
"@types/react-dom": "^18.2.5",
"@umijs/lint": "^4.0.71",
"dumi": "^2.2.1",
"eslint": "^8.43.0",
"father": "^4.2.3",
"husky": "^8.0.3",
"lint-staged": "^13.2.2",
"prettier": "^2.8.8",
"prettier-plugin-organize-imports": "^3.2.2",
"prettier-plugin-packagejson": "^2.4.3",
"react": "^18.2.0",
"react-dom": "^18.2.0",
"stylelint": "^15.8.0"
}
}
|